|
|
|
Solar Thermal Photovoltaics
|
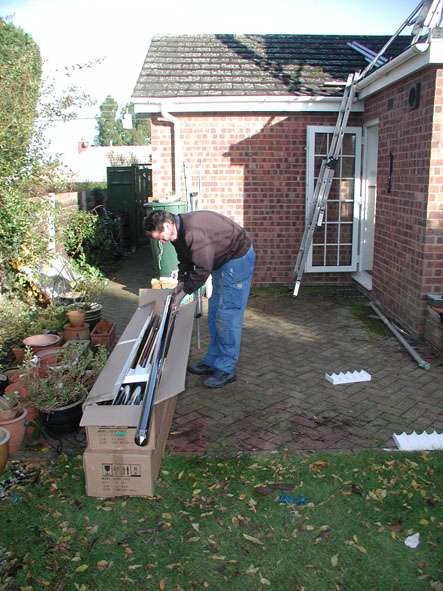
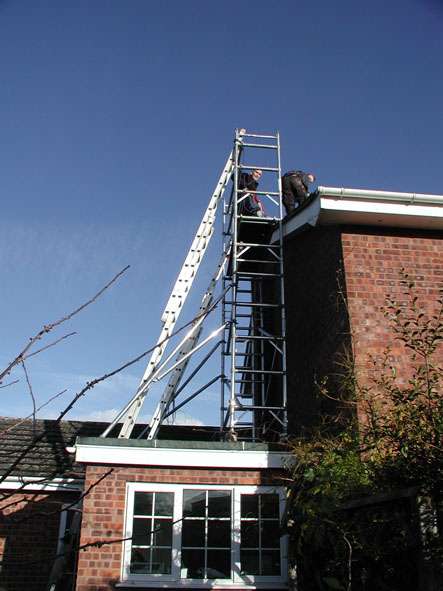
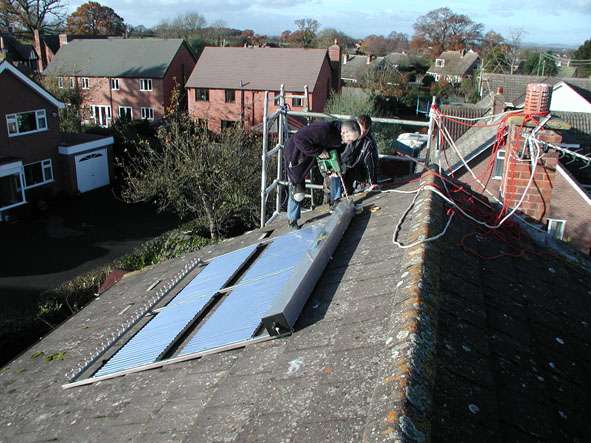
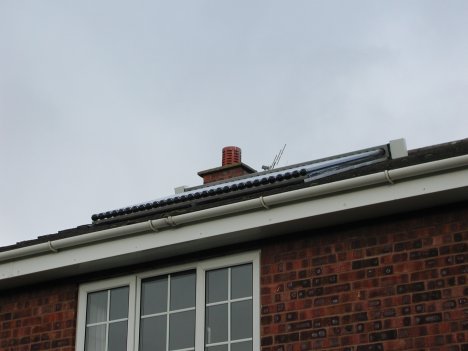
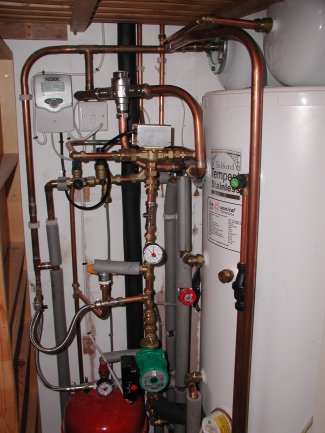
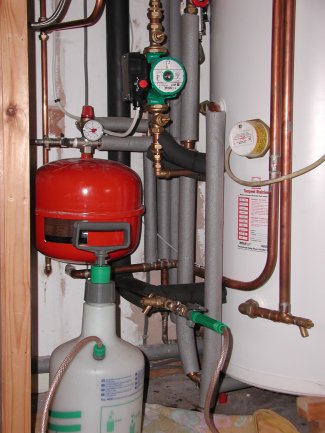
John Howard of Shrewsbury purchased an Eco-58-1800-30 collector and some other components in October 2007, and has sent us the following comprehensive report of its installation. John writes: "Hi Viv, here is a report on my installation, which seems to be working a treat! Thank you for your help and advice. I believe my plumber, Peter Lloyd, was so impressed that he has bought from you as well; maybe there will be more spin-off from these parts for you!" "I had long thought about going solar but always thought it was far too expensive, might not be effective, and the pay-back time made it unrealistic. Then a friend had a system installed that he obtained from Essential Spark and he said that in the summer period he was getting temperatures in the LOWER part of the cylinder in excess of 65 C ! ; I was impressed! Searching on the Net, I found there were very few companies who would sell the kit on a supply- only basis- the only ones I found were Essential Spark , Navitron, and Eco-nomical. I rang them all and discussed my requirements, and was most impressed by the help and advice I had from Viv at Eco-nomical, so decided to go for them (they are also a bit cheaper !) Things to consider- is your roof South facing? Do you need planning permission? (in most cases , unless you live in a conservation area, you won’t) Are you prepared to help with the installation? (otherwise it may cost you more than you think!). I decided to go for the 58mm x 30tube panel so that it would have some effect during the Winter/Spring period also, thus saving on my heating bill then. I also bought a Resol BS4 controller which would control a Variable Pump Speed and a Motorised Valve to a Heat Dump Rad.in the roof to prevent over- heating during heat- waves and for peace of mind whilst on holiday. As I was going to employ the plumber who installed my new boiler and dual coil cylinder to plumb the solar system, I decided to source the other parts locally (apart from the Armaflex high temp. pipe insulation ,which plumbers’ merchants do not stock). Zilmet Solar Expansion Vessel- high temp. tolerant Wilo Smart Pump with isolating valves- temp. range to 110C, anti-jamming and very quiet, as it is in a bedroom cupboard Honeywell motorised valve- 88C temp tolerant (fitted on the Return pipe which is cooler than the Flow) Calefi solar safety valve- high temp. tolerant and rated to 4 bar. Thermostatic Mixing Valve- effectively it raises the heat storage capacity of the cylinder, so is also an added safety measure in times of high insolation. Telford Tempest Duel Coil, Solar Ready, Hot Water Storage Cylinder 300L Filling Loop- with 2 shut-off valves Non-return valve – to prevent back flow when the pump is not running- saves heat loss from the cylinder Drain cock- on lowest point of the system Pressure Gauge- when filling and also will show any leaks if the pressure drops Isolating Valves, and various compression fittings 15mm copper pipe- plastic will melt! Fernox Alphi-11 anti-freeze/ inhibitor 5L- concentrated Fortunately, the chosen day for installation was fine, sunny, dry and almost windless; it would have been gripping to lift the panel onto the roof in a strong wind! I was going to lift the panel onto the house roof from the utility room flat roof and assembled a light weight aluminium tower scaffold on it. I had already bolted the frame to the manifold and fitted the reflectors. The plumber had come the day before and plumbed in the parts into the cupboard and the radiator. in the roof, leaving bare pipe ends for the flow and return connection when the panel was installed. The plumber had brought his apprentice and between us we managed to haul the panel up 2 ladders, over the top of the tower without damaging the reflectors and onto the roof of the house. Being a climber, I am used to heights, but the plumber was very unsure, so we all belayed ourselves with old climbing ropes to the chimney! We also tied the panel to the chimney to stop it sliding off…. The next challenge was to secure it on the roof; we did this by sliding the straps under the tiles at the measured spacing (make sure the ends of the manifold are not over the joints in the tiles!) for bolting to the frame. We decided to fit the 3 top straps first and then the lower ones after by lifting the ends of the frame before fixing inside the roof; internal fixing was to noggins of 3x2 timber fixed between the rafters. The roof has large, thick concrete tiles so the next problem was making the holes for the flow and return pipes. We tried using a large 22mm TCT drill (not on hammer) first but that made little impression, so we resorted to using a small diamond tipped drill ,drilled several holes close together and then broke them through with a small cold chisel.- hard work but we did it. The holes round the pipes were filled with silicon sealant (the manifold sensor cable was pushed under the tiles to save having to drill a separate hole ) Whilst the plumber was completing the solar circuit and wiring the controller, motorised valve and the sensors (fixed in place with silicon sealant), I started to prepare the tubes by smearing heat transfer paste to the ends of the heat tubes. We then passed the tubes up onto the tower platform in a chain, 8 at a time resting them on the polystyrene mouldings to stop them rolling off (don’t just put them down!) The plumber then filled the system by opening the filling loop (we vented the manifold by slackening off the compression unions- the remaining air will be vented from an air bleed valve fitted at the inside apex of the roof and above the height of the manifold), and then drained it into a bucket- why? So that we knew how much Fernox to use; I decided to go for the maximum recommended dilution of 40 % which gives a minimum of minus 22C- should be sufficient for these days of global warming, I think!! This was infused by using a garden sprayer connected, without the spray head, to a ½ inch BSP male fitting on the lowest point of the circuit; the sprayer was pumped up and the valve was opened until the pressure gauge showed 2bar (water boils at a higher temp. when pressurised );you may need to pump the sprayer further whilst filling, and do not let the fluid level drop below the level of the outlet tube of the sprayer or you will be injecting air!!) When the system is filled and the electrics completed, (do not run the sensor cables alongside any power cables) start to insert the tubes (DO NOT INSERT THE TUBES BEFORE THE CIRCUIT IS FILLED OR THE TUBES MAY OVERHEAT ); insert just a few tubes close to the flow end of the manifold and then test the system by seeing if the controller records any temp. differential. The tubes need to be inserted loosely with the end caps fitted through the clips first, and twisted right up into the manifold (a smear of paste round the manifold cups may ease them up- no, not Vaseline!) Secure the lower ends of the tubes by tightening the clips just FINGER TIGHT- or you’ll crack them!!! Finally, insulate the outside unions and pipe with high temp. pipe insulation. For a neat weatherproof cover (wind chill will be significant otherwise) I bought 2 plastic electrical boxes of sufficient depth, cut slots in them for the pipes to enter, filled them with rock wool, screwed the covers on and stuck them to the ends of the manifold with silicone sealant- I just hope they will not melt …. When all the tubes had been inserted, a heat differential between the Collector and the bottom sensors was immediate. Fortunately, Viv had provided me with a supplementary sheet to the handbook that came with the BS4, which is hard to understand, so I was able to programme the controller fairly easily, using the settings suggested. I may change these when I have seen the effects in due course. Although it is winter (14th December) the controller has already recorded a temp. of 46C at the manifold and 32C at the lower sensor- all useful heat which means the boiler is heating the domestic hot water less ,thus using less of the world’s finite fossil fuels and helping to curb the now very apparent climate change and Global Warming".
Thanks for the information, John. |
Send mail to
SW@eco-nomical.co.uk with questions or
comments about this web site.
|